Difference between revisions of "Setting up the Horizon Ramdisk"
| Line 11: | Line 11: | ||
== Procedure: == | == Procedure: == | ||
<br> | <br> | ||
1> Boot into ''MAME'' and the ''TI-99/4A ROM'' <br> | 1> Boot into ''MAME'' and the ''TI-99/4A ROM'' <br> | ||
2> Bring up the ''MAME'' menu by pressing '''SCROLL LOCK''' then press '''TAB'''<br> | 2> Bring up the ''MAME'' menu by pressing '''SCROLL LOCK''' then press '''TAB'''<br> | ||
3> Configure your '''System Devices''' for your wanted configuration. For this example I will be showing PEB Slot #5 as the Horizon RAMDISK. | 3> Configure your '''System Devices''' for your wanted configuration. For this example I will be showing PEB Slot #5 as the Horizon RAMDISK. | ||
[[File:1.jpg]] | [[File:1.jpg]] | ||
4. '''Reset''' the machine for the settings to go into effect.<p> | 4. '''Reset''' the machine for the settings to go into effect.<p> | ||
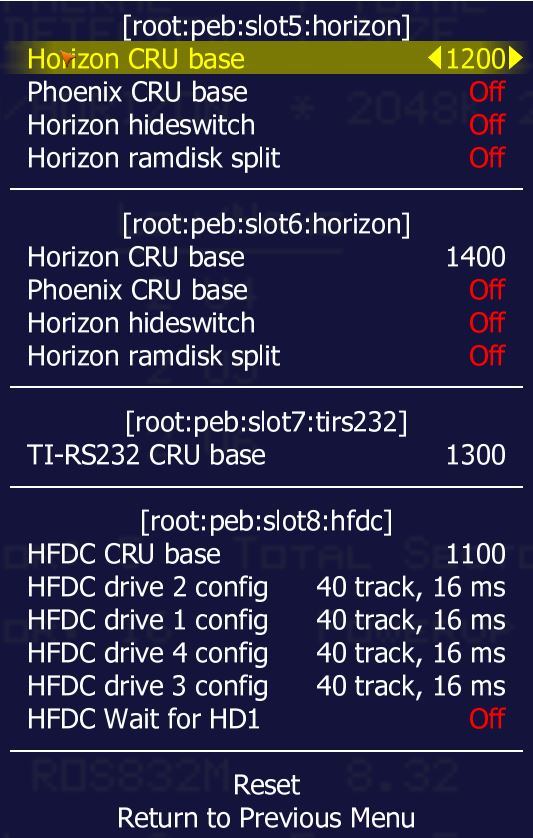
The default CRU address for the ramdisk is 1200. If there will be multiple HRD's then the CRU address will need to be changed for each additional HRD to a CRU that does not conflict with any other expansion card.<br> | The default CRU address for the ramdisk is 1200. If there will be multiple HRD's then the CRU address will need to be changed for each additional HRD to a CRU that does not conflict with any other expansion card.<br> | ||
5. Bring up the ''MAME'' menu by pressing '''SCROLL LOCK''' then press '''TAB'''<br> | 5. Bring up the ''MAME'' menu by pressing '''SCROLL LOCK''' then press '''TAB'''<br> | ||
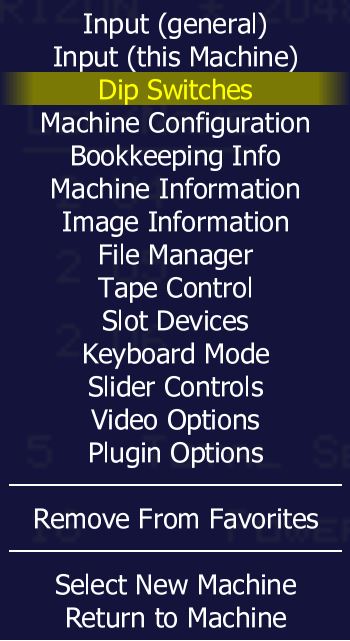
6. Select '''Dip Switches'''<br> | 6. Select '''Dip Switches'''<br> | ||
[[File:HRD2.jpg]] | [[File:HRD2.jpg]] | ||
<br> | <br> | ||
7. Select the '''Horizon''' ram disk slot<br> | 7. Select the '''Horizon''' ram disk slot<br> | ||
8. Select '''Horizon CRU base''' option and change the CRU appropriately<br> | 8. Select '''Horizon CRU base''' option and change the CRU appropriately<br> | ||
[[File:hrd3.jpg]] | [[File:hrd3.jpg]] | ||
<br> | <br> | ||
| Line 34: | Line 34: | ||
You will need to do this for each ramdisk within the system if you have more than one.<br> | You will need to do this for each ramdisk within the system if you have more than one.<br> | ||
9. '''Reset''' the machine for the settings to go into effect.<br> | 9. '''Reset''' the machine for the settings to go into effect.<br> | ||
10. Bring up the ''MAME'' menu by pressing '''SCROLL LOCK''' then press '''TAB'''<br> | |||
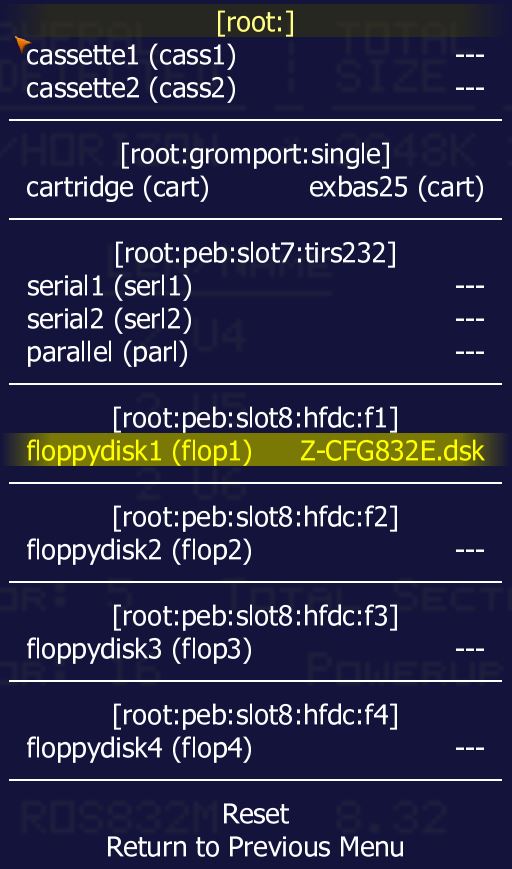
11. Select '''File Manager''' to select cartridge and disk images. | |||
12. Mount the ROS disk image <br> | |||
[[File:HRD4.jpg]] | |||
Revision as of 21:48, 28 August 2016
The Horizon Ramdisk 4000 can be emulated via MESS/MAME. This selection will emulate a two megabyte ramdisk which is actually saved in the "\nvram\ti99_4a" directory within a file.
Note: The directory is usually classified by the current machine type being emulated
The emulation will respond to the equivalent speed of the ram disk on actual hardware.
This process was created using MAME1076b 64bit and ROS version 8.32e.
Note: If using ROS 8.14f or earlier, sector sizes will be limited to 1600. ROS 8.32 allows for 3200 sectors per disk.
Procedure:
1> Boot into MAME and the TI-99/4A ROM

2> Bring up the MAME menu by pressing SCROLL LOCK then press TAB

3> Configure your System Devices for your wanted configuration.  For this example I will be showing PEB Slot #5 as the Horizon RAMDISK.
4. Reset the machine for the settings to go into effect.
The default CRU address for the ramdisk is 1200. If there will be multiple HRD's then the CRU address will need to be changed for each additional HRD to a CRU that does not conflict with any other expansion card.
5. Bring up the MAME menu by pressing SCROLL LOCK then press TAB
6. Select Dip Switches

7. Select the Horizon ram disk slot
8. Select Horizon CRU base option and change the CRU appropriately

You will need to do this for each ramdisk within the system if you have more than one.
9. Reset the machine for the settings to go into effect.
10. Bring up the MAME menu by pressing SCROLL LOCK then press TAB
11. Select File Manager to select cartridge and disk images.
12. Mount the ROS disk image

